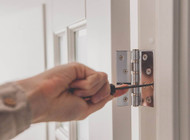
Replacing Your Door Hinges
Published by Stainless Door Hardware on 19th Nov 2021
Door hinges aren’t often something that is thought about often when buying new door parts. Chances are you’ve been hearing lots of creaking from your door or it has trouble opening due to old hinges. The sensation you experience with new hinges is unexpected, but it leaves you wondering why you didn’t do it sooner.
When it comes to replacing the hinges, you may be a little lost, and that’s ok. Door hinges aren’t something that people normally replace or fix all that often. If this is the case, then keep reading, because Stainless Door Hardware has put this guide together to help you through this sometimes confusing process.
Choosing The Correct Door Hinge
While they may seem like a subtle part of the door, door hinges come in a range of different styles and sizes. The hinges are usually always dependent on the door itself. Whether it’s an interior or an exterior door, the hinge will always be important.
If the door opens both ways, a spring action hinge is perfect and if the door opens wide, a parliament wide leaf hinge is the way to go.
Functionality is important, but it’s also important to select the correct finish. For the best and most appealing result, it’s best to choose a finish that matches your door handles.
Replacing Hinges
Whether you’re replacing your hinges for design or for better functionality, replacing door hinges is an easy and manageable at-home project.
In order to do this, you’ll need some basic tools that can be found around your home:
- Sturdy door stops
- The new hinges
- A tape measure
- Screwdriver
The Steps
Now that the necessary tools are gathered, its time for the fun part:
- Keep the door steady
Open the door so that it's completely open and the entire hinge is exposed. Put the doorstop under the door to keep it still and steady.
2. Remove the door hinges
If the door hinges are already in the correct position, you can start by removing the upper hinge and remove the screws. Once unscrewed, pull them away from the door.
3. Prepare the door for the hinge
Sometimes if the hinge has been there for an extended period, you may have to do some minor sanding to make sure it’s ready. Once sanded, you can paint over it so it matches the rest of the door.
4. Install the new hinge
Place the hinge where the old one once was. Carefully secure the hinge where the old one once was.
5. Repeat for the second hinge
Follow the previous steps for the bottom hinge.
6. Test the new hinges
Now it’s time to make sure the new hinge is ready for use. Swing the door open and closed a few times to make sure it’s steady and smooth.
New Door Hinges
You shouldn’t be hearing strange noises or struggle to open your doors. Visit Stainless Door Hardware for all your door hinge needs.

